 Captions (FCC/SDH)
 Subtitles
 Video Description (AD)

How to Record Audio for Transcription: 8 Proven Tips for Clear Results
Clear audio is essential for accurate transcription. Good audio quality saves time and reduces errors, leading to faster and more affordable transcripts. According to a 2023 study, 70% of transcription errors come from poor audio quality. This guide will show you proven steps to capture recordings ideal for transcription, making every dollar count.
Why Audio Quality Matters in Transcription
When it comes to transcription, clean audio is key. Top problems that harm transcription accuracy are:
- Noisy backgrounds
- Low speaker volume
- Multiple people talking at once
Transcription services often charge more for recordings with these issues. Better recordings mean more accurate, faster, and less costly transcripts. Learn how to record clear audio below.
8 Tips to Improve Audio Recording for Transcription
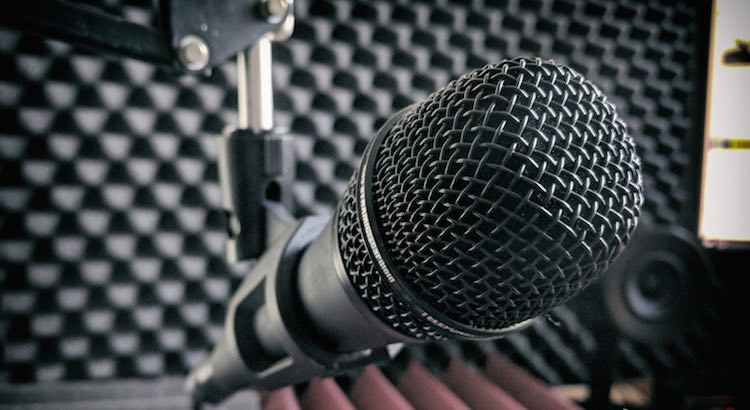
1. Choose Quality Audio Equipment
- Use a good microphone designed for speech.
- Handheld recorders are better than phone mics for interviews and meetings.
- For outdoor or group settings, consider microphones with noise-canceling or bidirectional features.
A study from 2022 showed that professional microphones reduce background noise by up to 60% compared to phone microphones.
2. Limit Background Noise
- Select a quiet space, away from crowds, music, or busy streets.
- Close doors and windows to stop outside noise.
- Turn off unnecessary devices like printers, air conditioners, and computers.
- Mute notifications and silence phones.
Even quiet background sounds, like computer fans or typing, get picked up by sensitive microphones.
3. Place the Microphone Properly
- Keep the microphone close to the person speaking, but not too close (about 6–12 inches is best).
- Avoid placing the mic between speakers to reduce overlapping speech.
- Don't interrupt or talk over one another; allow each speaker to finish.
Clear microphone placement ensures every word gets captured.
4. Do a Trial Recording
- Test your gear with a short trial before the real session.
- Check for sound clarity, proper microphone placement, and easy device handling.
- Listen to the test recording for any unwanted background noise or unclear speech.
- Learn the controls for starting, stopping, and saving recordings.
Testing equipment reduces technical issues and last-minute surprises.
5. Use a Digital Voice Recorder
- Digital voice recorders produce clear, stable audio files.
- They are less prone to interruptions and often have better storage and battery life than phones.
- You can easily transfer files to computers or share them with your team.
Digital recorders are available in many price ranges and can make a big difference in clarity.
6. Prepare and Notify Participants
- Share the agenda with everyone in advance so they can prepare thoughtful responses.
- Warn participants about the recording and remind them to speak one at a time.
- Preparation can cut down on awkward pauses, stammers, and filler sounds like “um” or “uh.”
Clear agendas and informed speakers lead to smoother conversations and easier transcription.
7. Speak Clearly and at a Moderate Pace
- Encourage everyone to speak up and enunciate words.
- Avoid speaking too quickly or mumbling.
- If someone is hard to hear, ask them to repeat before moving on.
Clarity and pacing help transcribers capture every detail accurately.
8. Test with Your Transcription Service
- Record a short sample and send it to your transcription provider for feedback.
- Ask for advice on making future recordings clearer.
- Quality checks save money on transcription services by reducing turnaround time and error rates.
Some services also offer transcription proofreading to improve accuracy further.
Bonus Tips for Special Audio Needs
- For video or online meetings, consider closed captions or subtitles to help viewers follow along.
- If you need transcripts in other languages, use text translation or audio translation services.
- Automate your process with an AI transcription subscription and get faster results on large projects.
How High-Quality Audio Lowers Transcription Costs
Most transcription providers, including GoTranscript, charge higher rates for poor-quality audio because it takes longer to process (2023). Lower your costs by delivering clean, clear audio recordings.
- Check transcription pricing to see how audio quality affects costs.
- For video captions, see captioning services pricing.
You can also directly order transcription or order captions when you are ready.
Conclusion: Capture Great Audio for Better Transcription
Following these tips will help you record audio that is clear, organized, and easy for transcriptionists to process. This saves you time, reduces your costs, and ensures more accurate transcripts.
For fast, high-quality results, GoTranscript offers a full range of solutions—including manual and automated transcription services, captioning, subtitling, and translation services. Get started today to see the difference clear recordings and professional transcription can make for your next project.


